Oatmeal Cookies. Just a mere mention of these bring back so many vivid childhood memories for most of us. A classic oatmeal cookie recipe has nothing more than flour, oats, butter, eggs, sugar, leavening agent and a mix-in like raisins, chocolate chips, nuts, dried berries etc. Wouldn't it be incredible if we could put a healthy spin to our beloved cookie recipe? How about whole wheat flour, rolled oats, healthy fat like coconut oil and honey (or agave). Since quite some time I was in look out for a fool-proof recipe and am happy to report today's version is exactly that. Many of my co-workers at office loved them when I took a batch yesterday and even my skeptic better-half gave a thumbs up! Excited with the cookie success and a sweet comment about my blog on Instagram by Anusha nudged me to come out of my slumberland and actually write about them. Enjoy!
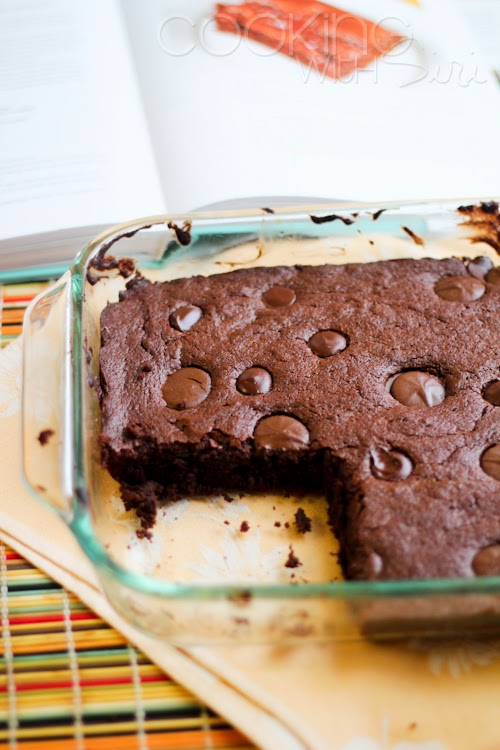
Are you a dessert person? I am not and that might be the reason why I have only about 22 recipes blogged since seven years!. Sometimes though a rare sweet craving hits suddenly and you will see me indulge on them, guilt-free. And I have friends, nieces and a husband whose regular sweet cravings must be attended to. So, now you know why I baked these absolutely delicious brownies when the lovely bunch of people at Recipe Redux chose chocolate combo as a theme for February. These Spectacular Chocolate Espresso Brownies are fudgy in the inside and cake-y with occasional melted chocolate puddles on the outside. Also, don't you all agree Chocolate and Coffee are match made in heaven? Try it to believe it!
I was in Munich (Germany), far away from home when I first read about this recipe on Rev's blog. My immediate reaction was oh-my how beautiful does that look and next was - damn! why am I not home to bake the cake right away! Once I came back, I jumped on the first opportunity and made it - not once but twice in a row. It was that delicious. Sprinkling some sugar on top just before baking is a lovely idea to caramelize the top and to turn the strawberries into a goo-ey mess which are sneakily delicious. It is time to join the Strawberry Winter Cake Movement. Wohoo!
Nothing spells like #yum that this ridiculously easy berry cake. Trust me! :-)
The season of festivities has already begun here in India (Dussehra + Deepavali) and in US (Halloween + Thanksgiving + Christmas). While I was US, October brought two things - lots of snow and the exuberant holiday spirit. It was very hard to give it a miss and not get sucked right into it. I never wore a Halloween costume myself but I have seen many friends who used to start their planning on what to wear and whom to scare with such gusto.
Hoot Owl Cookies
Now that I am staying far far away and terribly missing them, I made a batch of hoot owl cookies, right at the very last minute. I had all these plans to write about a cake recipe today but the nostalgia of celebrating couple of Halloweens with my friends back in US got the better of me. :-)
The hardest part of this super fun cookie recipe is the wait of at least 2 hours for the dough to set a bit. Other than that, it is a real breeze to make these and store in an air tight container. I have been munching all day on these and my 4 month old little nephew got real excited looking at them. Make some and enjoy this year's Halloween with friends and family.
Do I look scaryyyy?
This is Recipe 62 added to 2013 Recipe Archive. Check out the rest of the recipes too.
Oh boy! What a wonderful feeling it is to celebrate 6 years of non-stop food blogging. I really didn't have a clue what I was getting myself into when I started this blog on a hot Sunday afternoon way back in 2007. I was neither a good cook nor good photographer then. I was nothing. Just someone who was tired of waiting, someone who was hoping something nice would happen in her life.
I have this habit of listening to radio while I work. With music on, my mind is more attentive, works faster and tend NOT to fall asleep. ;-) Being Valentine's day, am having an overdose of sweet, lovey-dovey songs and love stories/poems from radio listeners since morning. Pardon me, am in no mood to talk about it anymore. (I already wrote much in my last post). We all know the importance, so let me just jump right into today's recipe as that's what I am most excited about! :-)
Those heavily freckled, overripe bananas that usually take a permanent space on our cooking counters taste yum in baked goodies. Don't throw them away. Make a pudding cake for a change and treat your friends with this scrumptious dessert. Also note the ingredients list is very similar to what you would want to make pancakes. How about you switch the plans and make this pudding cake for breakfast instead? :-)
1 cup all purpose flour
1/2 cup blueberries (I used dried. fresh or frozen ones can be used too)
a pinch of salt
1 cup milk
3/4 cup powdered sugar
3 tsp baking powder
1 overripe banana, mashed
1/2 cup unsalted butter, melted
1 egg, lightly beaten
1 tsp vanilla extract
For topping - 1/2 cup brown sugar, 1/8 cup maple or golden syrup and 1/2 cup boiling water
Preparation:
Preheat the oven to 180°C (350°F/Gas 4). Grease the bottom of casserole dish + few ramekins or a big 2.5L baking dish. Keep aside.
In a bowl, add the mashed banana, milk, melted butter, beaten egg and vanilla extract. Whisk together until well combined. Keep aside.
Sift together - flour, salt, powdered sugar and baking powder.
Add sifted dry ingredients to the banana mixture and mix gently.
Toss blueberries as well. Pour the mixture into the greased baking dish.
For the topping, place the brown sugar, maple syrup and water in a small pot and bring to a boil. Reduce it to simmer and let it thicken a bit.
Pour few tablespoons of boiling mixture on top of the pudding and bake it for 25 to 30 minutes or until cooked through when tested with a toothpick.
Serve. I liked the cake plain and simple. You can also try with some vanilla ice cream.
..in the oven..
I couldn't wait for long to dig and eat it all! Yum! Oooh, I simply love overripe banana in baked goodies.
I later also tried Banana Butterscotch Pudding Cake without blueberries or the brownsugar topping. It tasted equally delicious! :D
Before I say goodbye for today, let me share the one and ONLY gift TH gave me in all these years we have been together. :-)
This is Recipe 12 added to my 2013 Recipe Archive. Check out the rest of the recipes too!
What's with this rain, I say? Not one evening went by since past one week where we had a clear sky after 6pm. and the weather forecast says the situation will not change for next 24 hours. It's not like I detest rain. Don't get me wrong. But, an overdose of anything will get on your nerves by some point.
...and I am at that point!!.
To pep myself up, I wanted something that can be made quickly, grab a coffee and eat in peace. What else other than "muffins" that perfectly fit the bill. :-) Just combine few ingredients that are commonly found in pantry, mix, pour and bake. In less than half hour, you have a fresh batch of muffins ready to be devoured. These are THE most enticing food when its raining or when I am craving to have something quick.
So, next time when it rains, make these Dried Blueberry and Banana Muffins - soft & cake-y from inside and light golden brown crumb with a subtle banana flavor and succulent blueberries to bite into. Enjoy!
4 tbsp (1/2 stick butter), at room temperature
1/2 cup sugar
1 egg
1 ripe banana, mashed (~ 1/2 cup)
1/4 cup milk
1 cup all purpose flour
1 tsp baking powder
1/4 tsp. ground cinnamon
3/4 cup dried blueberries (fresh or frozen works too)
Preparation:
Step 1: In a medium bowl cream butter and sugar (with an electric mixer or hand). Add egg. Mix in bananas and milk.
Step 2: Sift together - flour, baking powder and ground cinnamon. Carefully fold in blueberries. If you are using frozen blueberries, fold them while they are still frozen or they will turn the batter purple. Dried blueberries do not need to be reconstituted before they are added.
Step 3: Fold (flour + blueberry mixture) into banana mixture carefully, only until the batter is moist.
Note: Do not overmix.
Step 4: Preheat oven to 375 F or 190 C. I used silicone muffin cups with a paper cup inside. If you are using a muffin pan, grease lightly with butter. Spoon batter into muffin cups, filling cups until 3/4ths. Top with one or two blueberries or chocolate sprinkles. Bake for 10-15 minutes until muffins are light golden brown. When a tooth pick inserted in the middle, it should come out clean.
Let them cool for 5 minutes in the muffin cups, then transfer to a cooling rack. Serve for breakfast, brunch or just as a snack. You really don't need a reason and specific time to enjoy a fresh home-made muffin. Isn't it.
Storage: Tightly wrap each muffin in a plastic wrap and store in an air tight container. Since it has banana, its recommended to consume these within few days.
Just pinch me Will ya? I can't believe its been 5 years since I started this little blog of mine. 5? Are you kidding me? that is like half-a-decade!. Every single moment, every single recipe and every single thought I put in here is so worthwhile and so exhilarating & relaxing at the same time. How can such feelings co-exist? Well, I am still figuring that out. :-)
Right now as I look back, its not the numbers that matter to me but the evolution and the experience itself. I got to know an amazing bunch of people through blogging. They inspire me. teach me and be there during my happy times and also at the times of despair. Some live in various parts of the world, many whom I never met but they are just a phone call or an email away!. Wow, can such virtual relationships sustain over time? Apparently yes. I am eternally grateful to God for sending them to me. You know who you are and Thank you for your love and for just being a part of my life.
A birthday is never complete without a cake. Isn't it? But, for today I made few quickJalapeno Corn Bread Muffins served with Vegetarian Chilli. It is a combination I very much miss since we moved back to India, so I thought what better occasion do I need to feature these two recipes on the blog. As a way to say Thank you for your affection and support over all these years, I planned a few exciting giveaways for you all. Enjoy!
3/4 cup cornmeal
1/2 cup whole wheat flour (atta)
1/2 tsp baking soda
1.5 tsp baking powder
1/4 tsp salt
1/4 cup tightly packed herbs - mint & coriander/cilantro
2 tbsp chopped jalapeno peppers
1 egg
2 tbsp olive oil
3/4 cup milk (or buttermilk)
Preparation:
Step 1: Pulse cornmeal until smooth texture. In a mixing bowl, add cornmeal, whole wheat flour, baking soda, baking powder and salt. Mix.
Step 2: Add herbs and jalapenos to it.
Step 3: In an another bowl, beat together - egg, olive oil and milk.
Step 4: Add wet mixture to dry ingredients and gently mix everything.
Step 5: Preheat oven to 180 C or 350 F. Grease ramekins with olive oil and pour 3/4ths with batter. Top with some chopped jalapenos if desired. Bake for 18-20 mins until a toothpick or skewer when inserted in the center comes out clean. Rest for 10 mins.
Step 6: Run a knife around the edges and carefully unmold. Serve as a side accompaniment with soups, stew or chilli (recipe below). Wrap the rest of the muffins in a plastic cling to prevent from drying out. Microwave for few seconds and they are as good as fresh.
I won this set of ramekins as a giveaway from Divya's blog. :-)
{Recipe} Easy Vegetarian Bean Chilli
Ingredients:
3 cups boiled beans - I used chickpeas, black eyed peas, pinto beans and soya beans.
1 onion, chopped
2 garlic cloves, minced
1 carrot, peeled and chopped
1 bell pepper, chopped
2 tomatoes, chopped
2 cups water
1 tbsp cumin powder
1 tbsp chili powder
1 tbsp olive oil
salt and pepper, to taste
grated cheese, for topping
Preparation:
1. In a big pot, heat olive oil and saute onion and garlic for few minutes. Add carrot and peppers. Cook until soft.
2. Stir tomatoes and beans. On a low heat, cook for 3-4 minutes. Season with salt, chilli and cumin powder and pepper. Add water and continue cooking by stirring once or twice in the middle for 30-40 minutes.
3. Top with grated cheese and Serve hot with cornbread. Save left overs in refrigerator or freeze.
Now for the fun part. To celebrate the blog-o-anniversary, I have some goodies for you all. Just like before, there are two giveaways. One for Indian readers and other for rest of the world.
Would you believe if I said we hardly vacationed anywhere since past few months. Blame it on work, health, or simply lack of opportunity and when we did get one to tag along with my sister & her husband, we just jumped on it. Hence this quick 2-day trip to Goa.
If you are a sun-soaking-beach-loving person or hate monsoons, then July/August is not the time to visit Goa. But if you are in for some sporadic rainfall, lush greenery and lovely breeze all around, then this is the right place at the right time. The experience would be completely different during summer season when the beaches, malls, flea markets are buzzing (read as crowded) with tourists. Now, Goa is a hidden gem - serene and quaint.
Here are some pictures from our trip.
a quaint corner of a cafe where we had our lunch
lush greenery all around --> That's Goa in monsoons.
Once back home, the baking bug caught me during the weekend and quickly baked some cookies using Martha Stewart's Basic Vanilla Cookie Dough recipe which I bookmarked a very long time ago. This recipe is so versatile and can be used as base for countless varieties of cookies. Just a make a batch and then refrigerate or freeze. Cut a piece of cookie dough when you want to crave some and save the rest. How cool is that.
Today I made some Cut-Out cookies using the dough. Just roll, cut, sprinkle, bake and eat! :-)
Cut-Out (Star) Cookies. Any pretext to make these today is a valid excuse! :P
Butter + Sugar --> Creamed until pale & fluffy
Cookie Dough versatile enough to make various kinds of cookies. I will share a few in coming posts.
It's time to get creative and use this master dough to make any shape or colour of cookies, perfect for any occasion
3 cups all-purpose flour
3/4 teaspoon baking powder
1/2 teaspoon salt
1 cup (2 sticks) unsalted butter, softened
1 cup granulated sugar (or 1 3/4 cup of powdered sugar)
1 large egg
2 teaspoons vanilla extract
Note: If using salted butter, omit salt from the ingredients list. But, I personally prefer unsalted butter as the salted version has an after taste which is not-so-pleasant to the taste buds.
Preparation:
1. On a wax paper or in a bowl, mix together flour, baking powder and salt. Keep aside.
2. Beat butter and sugar with an electric mixer on medium speed until pale and fluffy. If using a whisk to cream then use powdered sugar for easy, smoother dough. Scrap with a spatula as you go. Beat in egg and vanilla on a low speed. Add flour 1/2 cup each time and beat until combined. If the dough is dry, then add few tablespoons of milk.
3. Divide into two portions and wrap each of the cookie dough ball in plastic wrap or wax paper and refrigerate for atleast an hour. The dough will stay good for 3 days when refrigerated. When kept frozen, the dough is good for 1-2 months. Cut out the needed amount of dough and thaw in the refrigerator overnight in case of frozen dough.
Making of Cut-Out (Star) Cookies
1. Preheat oven to 190 C or 375 F.
2. On a lightly floured surface, roll out dough into a disc of 1/8- to 1/4-inch thickness. Using a cookie cutter, cut out cookies into desired shapes and line them up on a parchment or wax paper. Refrigerate the cookies (before baking) for 15-20 mins until firm.
3. Sprinkle some chocolate strands on the top and bake for 8-12 minutes or until light golden brown. Keep an eye on the cookies after then 8-minute mark. Cool them on a wire wrack.
Serve and save the rest in an air tight container which will stay fresh for at least a week.
Enjoy!
Since its the first recipe with this dough, I have kept it simple using chocolate strands as the topping.
*******************************
Who said food can't look good in monochrome? :-). Sending the below picture as an entry to Black and White Wednesdays 40 guested hosted by Anusha, original concept by Susan.